By integrating AI into your development workflow, you can generate valid Checkly constructs—including URL monitors and Playwright-based browser checks—with minimal effort.
AI-assisted coding promises to massively upgrade developer productivity, and with Checkly’s model of Monitoring as Code, you can create monitoring coverage for all your services in minutes instead of days. This guide will show you how to create an AI development environment that lets you create and deploy all types of Checkly monitoring.
Setup
If you haven’t already, start by installing the Checkly CLI, then create a repository that will be the ‘project’ that contains all your Checkly monitors managed as code. If you don’t already have a project, create one with:
npm create checkly@latest
Next, install Claude Code globally with
npm install -g @anthropic-ai/claude-code
and from the root folder of your project and start Code with the claude command.
You’ll be prompted to sign in to or sign up for an Anthropic account.
I recommend using the Visual Studio Code plugin for Claude, which will make it easier to provide Claude Code with the VS Code file browser context (the VS Code plugin does a lot more than just context, this is just the most convenient feature we’ll use for this tutorial).
Add the Playwright MCP
You can give Claude Code access to a browser by adding the Playwright MCP to your local configuration with
claude mcp add playwright npx @playwright/mcp@latest
This will let us ask Claude Code to do things like crawling a particular website and acting on what it finds by opening the site in a browser.
Give Claude Code Some Context
Everything we write into the CLI interface is part of a ‘prompt,’ and by default, Claude Code will add a bit of information to what we submit as ‘context’ on that prompt. Ideally, our requests written into Claude Code would include context about our specific project: its structure, language, and even its purpose. Because of the npm create command we ran above, our folder already has a boilerplate version of a Checkly project. We can’t feed in all of these files as context, but we can add a summary of our whole project as context by opening Claude Code and running the command:
/init
Claude Code will scan the whole project, write a summary, and then store that summary in a local CLAUDE.md file. Claude Code will read that file and add it to our prompt every time it’s run within this project from now on.
Let’s add a bit more to this context, we want test files that make sense as a Checkly construct. Let’s add Checkly’s AI rules file to our CLAUDE.md context file:
mkdir -p .claude &&
curl -o .claude/checkly.rules.md https://www.checklyhq.com/docs/ai/checkly.rules.md -L
echo "- examine checkly.rules.md for code generation rules" >> .claude/CLAUDE.md
After this you’ll need to exit and restart Claude Code for it to pick up changes to our context file.
Create new URL Monitors
We’ll start with something easy. A URL monitor that will check an HTTP endpoint and alert if it doesn’t receive the right status code. With the context set from the section above, try a command like:
Create a new URL pinger for the site https://danube-webshop.herokuapp.com/ that runs every five minutes and doesn’t follow redirects.
After a few seconds, Claude Code will produce this:
import { Frequency, UrlMonitor, UrlAssertionBuilder } from 'checkly/constructs'

new UrlMonitor('danube-web-shop-pinger', {
  frequency: Frequency.EVERY_5M,
  name: 'Danube Web Shop Pinger',
  activated: true,
  request: {
    url: 'https://danube-web.shop/',
    skipSSL: false,
    followRedirects: false,
    assertions: [
      UrlAssertionBuilder.statusCode().equals(200),
    ]
  }
})
While we’re writing this simplest of monitors, it’s worth testing the limits of Claude Code’s context for writing valid Checkly configuration. One thing I tested while writing this article was whether picking the wrong prompt would result in invalid Checkly construct code. The Frequency class here doesn’t accept arbitrary values, so I wondered what would happen since the source file for Frequency won’t be part of Claude’s context. I tried requesting a check that ran “every 17 seconds” and Claude Code prompted me to run a find on the project to identify valid values for frequency. In the end, Claude Code did create valid code with this note in the process feed.

Create Playwright Synthetics Checks With Claude Code
It would be nice to have Claude Code automatically create the Playwright scripts we need to test our site’s features. However, without careful controls, any 2025-era coding agent tends to write Playwright code that is either out of date or doesn’t follow best practices. The best way to get high-quality output is through some prompt engineering and careful provision of context.
1. Start With Playwright Codegen
We can capture our behavior in the browser to script a test with Playwright Codegen, available either as a standalone utility, browser plugin, or VS Code plugin. Once Codegen is set up, start recording and record the following:
- Navigate to your homepage.
- Browse through multiple pages.
- Assert the visibility of 1-2 page elements.
Once you’re done, copy the resulting code and create a file in /__checks__ called homepage-browse.spec.ts. It should look something like this:
import { test, expect } from '@playwright/test';

test('test', async ({ page }) => {
  await page.goto('https://danube-web.shop/');
  await page.getByText('Haben oder haben').click();
  await page.getByRole('button', { name: 'Add to cart' }).click();
  await page.getByRole('link').click();
  await page.locator('a').filter({ hasText: 'Fantasy' }).click();
  await expect(page.getByText('The Polar Turtle')).toBeVisible();
  await expect(page.getByText('$9').first()).toBeVisible();
});
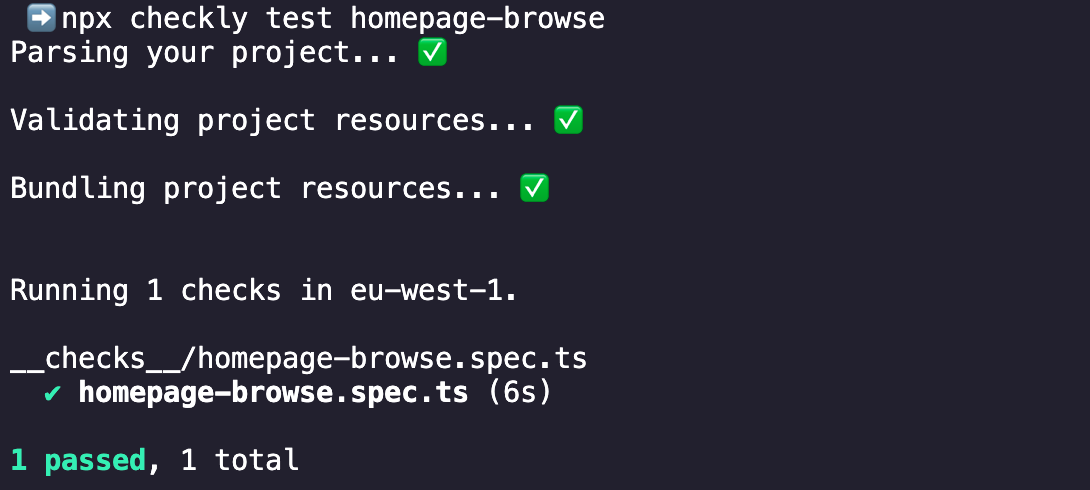
Lets make sure our script is valid by running this test:
npx checkly test homepage-browse
Without an exact file path, the checkly test command will run any test that matches this pattern.
and making sure the test passes.

Like always with the checkly test command, this test isn’t running from my laptop but rather Checkly’s global monitoring infrastructure.
Next we’ll want to create a .check.ts file for this browser check, which sets some check-specific settings and assigns the check’s logical ID.
import { AlertChannel, AlertEscalationBuilder, BrowserCheck, RetryStrategyBuilder } from 'checkly/constructs'

new BrowserCheck('browse-danube-homepage-v1', {
  name: 'Browse Danube Homepage',
  code: {
    entrypoint: './homepage-browse.spec.ts',
  },
  activated: true,
  muted: false,
  shouldFail: false,
  locations: [
    'us-east-1',
    'us-west-1',
  ],
  frequency: 5,
  alertEscalationPolicy: AlertEscalationBuilder.runBasedEscalation(1, {
    amount: 0,
    interval: 5,
  }, {
    enabled: false,
    percentage: 10,
  }),
  retryStrategy: RetryStrategyBuilder.linearStrategy({
    baseBackoffSeconds: 60,
    maxRetries: 2,
    maxDurationSeconds: 600,
    sameRegion: true,
  }),
  runParallel: true,
})
These settings are all optional and any not specified will default back to the account or project default, but it’s good to include them as our model.
If we want to check our formatting, we can run the checkly deploy command with the preview flag:
npx checkly deploy -p
2. Add our new Check to Claude’s Context
With these checks created, add their references to Claude’s context by giving Claude Code the prompt:
update my CLAUDE.md file with the new code in /checks
Let’s take one additional step, add the following lines to your updated CLAUDE.md file:
- When writing Playwright, don't set locators equal to const, rather just perform expect tests directly on locators
- When writing a spec.ts file, don't use locators based on CSS class
Pro tip: from the Claude Code prompt just hit octothorp ‘#’ to add to Claude’s memory.
3. Use Claude Code to create new Checks
Now that we’ve got a working test and config, let’s let Claude Code create a check for us:
Create a new browser check for https://danube-web.shop/ that clicks on a single button then checks the visibility of 10 different elements on the page
The importance of step 1 above is apparent during the output from this task, as Claude Code examines the known good.

In order to scan the URL provided, Claude Code will confirm that it can use the Playwright MCP to open a browser and access the site. The result is a nice clean test written to the spec:
import { test, expect } from '@playwright/test';

test('item visibility check', async ({ page }) => {
  await page.goto('https://danube-web.shop/');

  // Click on the "Books" heading
  await page.getByRole('heading', { name: 'Books', exact: true }).click();

  // Check visibility of 10 different items on the page
  await expect(page.getByText('Haben oder haben')).toBeVisible();
  // removed 6 more for readability
  await expect(page.getByText('Fantasy')).toBeVisible();
  await expect(page.getByText('$9.95').first()).toBeVisible();
  await expect(page.getByRole('heading', { name: 'Top sellers' })).toBeVisible();
});
Claude Code will confirm before creating the check and spec files with the configuration and script, respectively.
You can prompt for multiple checks at the same time, as the output is relatively token-efficient. As you can imagine, this unlocks the creation of a large number of synthetic monitors relatively quickly. Another use case that may be useful for larger projects, try prompting Claude Code with something like:
update every .check.ts file for a check that touches danube-web.shop, and change
the frequency to every 30 minutes.
Not only did this request work, but I even got sensible feedback about the checks that currently had no frequency setting:
  The url.check.ts and api.check.ts files don't have individual frequency settings -
  they inherit the default frequency from the project configuration in
  checkly.config.ts.
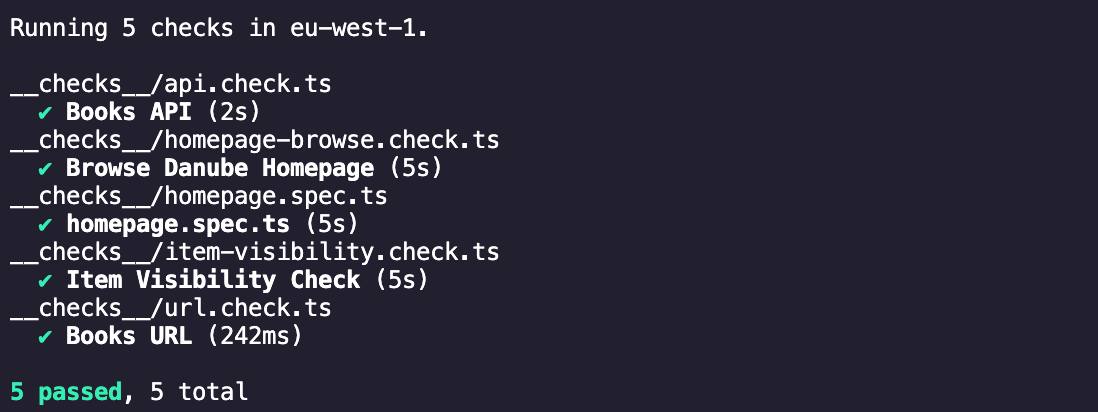
Once we’re done creating new checks, it’s time to run them all with:
npx checkly test
When I ran a number of generated tests, the only issue I ran into was a failure with the message: Error: expect.toBeVisible: Error: strict mode violation: getByText('Crime & Thrillers') resolved to 2 elements:. As the error message implies, the issue is that this locator:
await expect(page.getByText('Fantasy')).toBeVisible();
Found multiple results on the page. There are a number of ways to fix this with Claude Code, we could prompt Claude Code with:
revise locators in item-visibility.spec.ts to look at only the first result
This would change every locator, which may or may not be what you want! You could also paste in the error message to Claude and ask it to fix the script. Whatever route you take the result will be an edit to:
await expect(page.getByText('Fantasy').first()).toBeVisible();
If you’re having trouble reading the generated tests, take a look at Checkly’s Playwright documentation. Once Claude Code added a single .first() to my check, everything was passing:

Deploy With the Checkly CLI
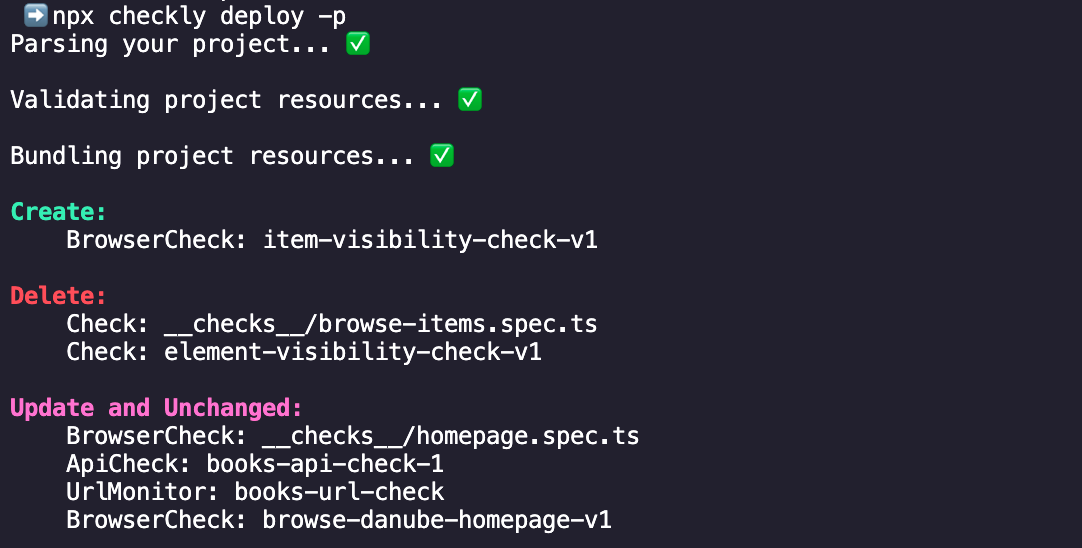
In our example, we want to deploy several checks at once, so it’s worth checking whether the configuration is properly formatted before deployment. Many problems would have been revealed while running test but if, for example, the logical IDs of current and existing checks are colliding, we’ll need to run deploy to detect that. Run the deploy command with the -p preview flag:
npx checkly deploy -p
This command won’t deploy anything, just parse our project and show us what will be created when we run the command without the preview flag.

npx checkly deploy -p command. Checks with new logical IDs are listed as created, existing checks are listed as ‘Update and Unchanged’ and any checks which used to be associated with this project and arent present in our folder will be deleted
If you’re getting strange results from a preview of deploy and you’re not sure why, it might be time to get in touch with the Checkly team, join our Slack for deployment advice!
Once we’re happy with what will be deployed, it’s time to run npx checkly deploy and create our checks!
Conclusion
AI-assisted coding tools like Claude Code can significantly accelerate the creation and deployment of monitoring checks with Checkly’s Monitoring as Code approach. By integrating AI into your development workflow, you can generate valid Checkly constructs—including URL monitors and Playwright-based browser checks—with minimal effort. One of the superpowers that an AI workflow can unlock is the mass updating of many files in your project. Updating a large number of test files can go way faster with the help of Claude Code.
While AI can handle much of the boilerplate work, human oversight remains essential for ensuring best practices, refining assertions, and maintaining high-quality monitoring scripts. By combining AI efficiency with developer expertise, teams can achieve comprehensive monitoring coverage in minutes rather than days.
Further Reading
To learn more about Checkly’s capabilities, explore these resources:
- Checkly CLI Documentation – Learn how to manage checks as code right from your command line.
- Playwright Testing Guide – Best practices for writing reliable browser checks.
- What is monitoring as code? — A comprehensive guide to infrastructure-as-code principles for monitoring.
- Checkly Community Slack – Join discussions and get support from the Checkly team and other users.
For more tutorials and advanced use cases, visit the Checkly YouTube channel, where you can see great tutorials like this guide to the Playwright MCP server: